--
图像的镜头校正
从车载摄像头拍摄的照片不可不免有些失真,我们需要有一些方法来进行还原。 wiki distortion
存在两种失真,一种是径向的(tangential distortion)(左图),一种是切向的(Radial Distortion)(右图)


前者引起的原因在于,相机的镜头没有与所拍摄的物体完全平行,导致生成的图像有倾斜失真。
后者引起的原因在于,由于光线在透过相机的镜头的边缘的时候会有所变形,导致生成的图像边缘失真。
我们可以通过一些预定义好的真实以及失真图像来确定参数,然后把这个参数应用到其他的图像上去。

x_distorted = x_ideal* (1 + k_1 * r^2 + k_2 * r^4 + k_3 * r^6)
y_distorted = y_ideal* (1 + k_1 * r^2 + k_2 * r^4 + k_3 * r^6)
x_corrected = x + [2 * p_1 * x * y + p_2 * ( r^2 + 2 * x^2)]
y_corrected = y + [p_1 * (r^2 +2 * y^2) + 2 * p_2 * x * y]
OpenCV 提供了对应的 API 来帮助我们做这个事情。
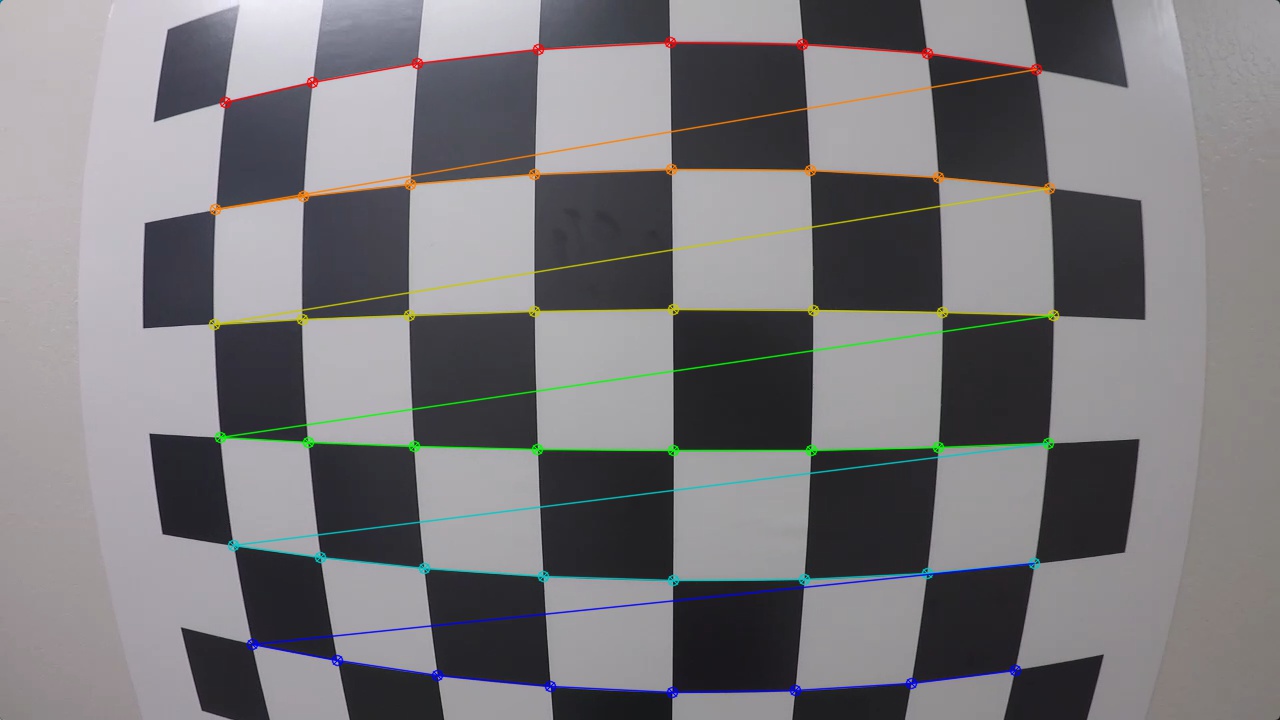
我们可以提供一个棋盘格子的图像,来告诉 OpenCV 上面有多少个格子,
没有变形的棋盘格是方方正正的,拍出来的照片总是有一些变形。
import numpy as np
import cv2
import matplotlib.pyplot as plt
import matplotlib.image as mpimg

# prepare object points
nx = 8
ny = 6

# Make a list of calibration images
fname = 'calibration_test.png'
img = cv2.imread(fname)

# Convert to grayscale
gray = cv2.cvtColor(img, cv2.COLOR_BGR2GRAY)

# Find the chessboard corners
ret, corners = cv2.findChessboardCorners(gray, (nx, ny), None)

# If found, draw corners
if ret == True:
    # Draw and display the corners
    cv2.drawChessboardCorners(img, (nx, ny), corners, ret)
    plt.imshow(img)
nx, ny 是如何确定的?
nx 和 ny 就是 x 轴 以及 y 轴上的 grid 点的数目,比如 棋盘格上面有 18 * 8,那么 nx 就是 18 - 1, ny 就是 8 - 1
我们可以这样做来进行 undistortion
import numpy as np
import cv2
import glob
import matplotlib.pyplot as plt
from matplotlib.image import imsave as mpsave
from matplotlib.image import imread as mpread

def get_calibration_mtx():
    # prepare object points, like (0,0,0), (1,0,0), (2,0,0) ....,(6,5,0)
    objp = np.zeros((6*9,3), np.float32)
    objp[:,:2] = np.mgrid[0:9,0:6].T.reshape(-1,2)

    # Arrays to store object points and image points from all the images.
    objpoints = [] # 3d points in real world space
    imgpoints = [] # 2d points in image plane.

    # Make a list of calibration images
    img_name_list = glob.glob('../camera_cal/calibration*.jpg')

    # Step through the list and search for chessboard corners
    for img_name in img_name_list:
        img = mpread(img_name)
        gray = cv2.cvtColor(img,cv2.COLOR_RGB2GRAY)

        # Find the chessboard corners
        ret, corners = cv2.findChessboardCorners(gray, (9,6), None)

        # If found, add object points, image points
        if ret == True:
            objpoints.append(objp)
            imgpoints.append(corners)

            # Draw and display the corners
            img = cv2.drawChessboardCorners(img, (9,6), corners, ret)
            cv2.imshow('img',img) # 'img' is the show window name
            cv2.waitKey(500)

    cv2.destroyAllWindows()

    ret, mtx, dist, rvecs, tvecs = cv2.calibrateCamera(objpoints, imgpoints, gray.shape[::-1], None, None)
    return mtx, dist
注意到这里我们给 objpoints append 的是同一个 objp,毕竟在 calibrateCamera() 的调用中它会保持不变的。
返回的 mtx 以及 dist 可以用来做进一步的 undistortion
下面就来做 undistortion
import numpy as np

def img_calibration(mtx, dist):
    img_name = '../camera_cal/calibration.jpg'
    img_org = mpread(img_name)
    img_dst = cv2.undistort(img_org, mtx, dist, None, mtx)
所以一个正常的流程就是:
1. 准备好一些棋盘格的图片,用同一个相机拍摄
2. 转换成灰度图
3. 利用函数 cv2.findChessboardCorners() 找到 corners
4. 构造对应的 grid points
5. 利用函数 cv2.calibrateCamera() 计算 distortion 相关的参数
6. 利用得到的参数作用在新的图片上(来自于同一个相机),得到 undistortion 的图片
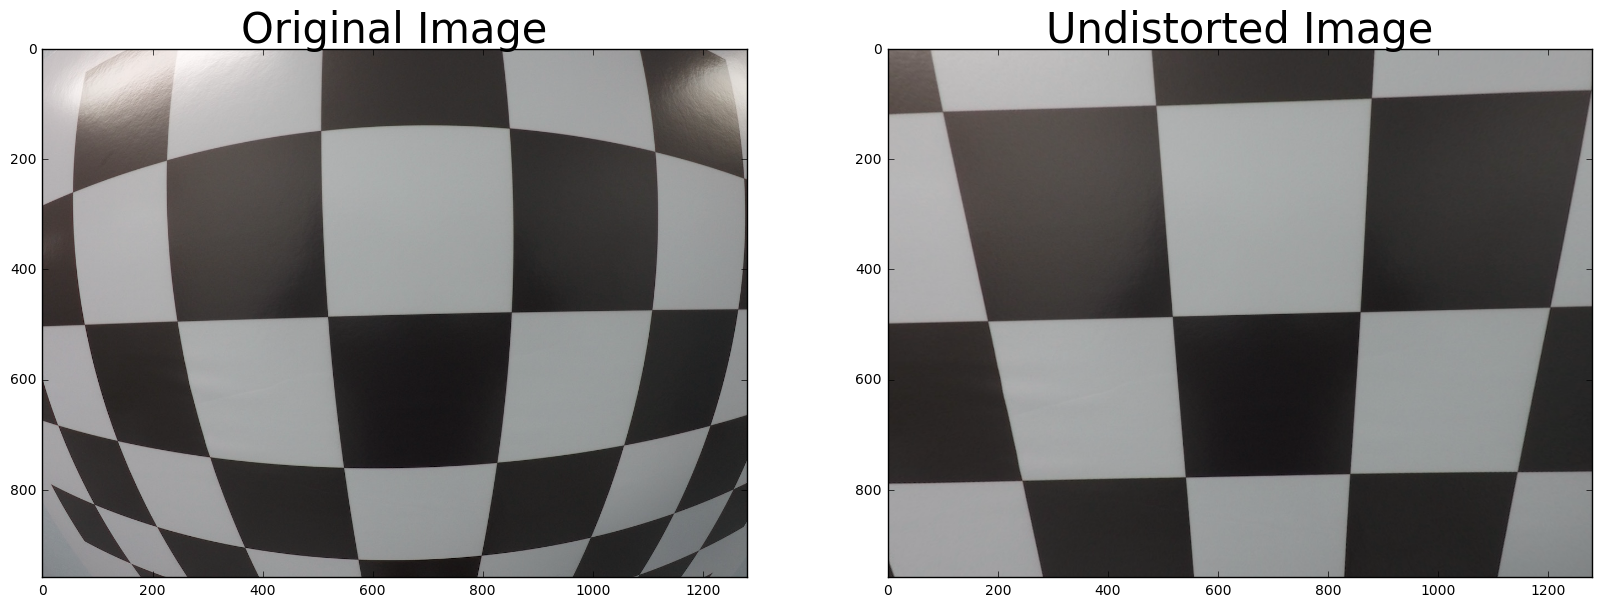
在经过这一系列处理之后,我们能够成功的把图片进行还原,比如这样: